Sunday, November 23, 2008
Thursday, November 20, 2008

Friday, October 31, 2008

Wednesday, October 8, 2008
Tuesday, September 9, 2008

Thursday, September 4, 2008
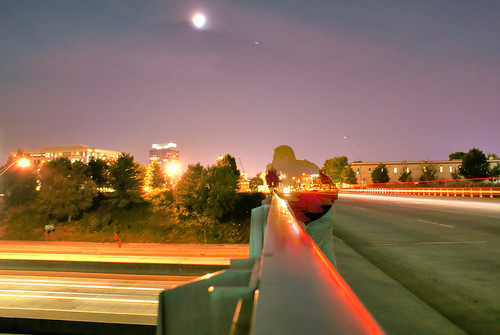
How to Create Professional HDR Images
High dynamic range (HDR) images enable photographers to record a greater range of tonal detail than a given camera could capture in a single photo. This opens up a whole new set of lighting possibilities which one might have previously avoided—for purely technical reasons.
Here are two links that i like in particular, my major point is that use Photoshop CS2 and above, do not use Photomatix. In Photomatix images come out "gunky" and "sooty". I wanted to assemble procedure to making HDR images but just came across two great learning tutorials, below, so my input would be minimal.
tutorial 1: HIGH DYNAMIC RANGE PHOTOGRAPHY
tutorial 2: How to Create Professional HDR Images
Sunday, August 31, 2008
Saturday, August 30, 2008
Tuesday, August 19, 2008
Saturday, August 9, 2008
How to Use the Lasso Tool to Select in Adobe Photoshop in 7 steps.
The Lasso tool in Adobe allows you to select an object out of an image by drawing freehand around that object. One would use the Lasso tool to copy, delete or move the object to a different part of the image or even to a new document. Follow the steps below to practicing using the lasso tool to select objects in Adobe .
 Step1 Open Adobe and open an existing image onto the Photoshop work area.
Step2 Select the Lasso tool from the Photoshop toolbox. The button is a picture of a lasso.
Step3 Click on the outside of one of the objects in your image.
Step4 Hold down your mouse button and use the Lasso tool to draw entirely around an object in your image until the end of the lasso meets the beginning of the lasso. You now have your object selected and are ready to work with that selection.
Step5 Click your mouse in the center of the object and move your mouse as you continue to hold down your mouse button. This will allow you to move the whole lasso selection so you can make any minor adjustments to your selection area.
Step6 Choose "Copy" from the "Edit" menu to copy your object selection into a new layer.
Step7 Click on the object in the new layer and hold down your mouse to move the object where you want it.
Tips: If you are zoomed in on the image too close press and hold space bar while in Lasso tool mode to Pan trhough the image.
To make straight lines around your object when using the Lasso tool, hold down the ALT key and click on your end points.
Press the "L" key on your keyboard to automatically change from the tool you are using to the Lasso tool.
For additional Photoshop Tutorials visit Photoshop-Garden.com.
Friday, August 1, 2008
Friday, July 18, 2008
Monday, July 14, 2008
touching up photos
A major advantage of digital photography is being able to easily rewrite history – you can make changes to the photos before printing or displaying. There are a variety of software packages that will allow you to do this - some photo album software will allow simple touch ups, like Google's Picasa, Apple's iPhoto or LView, while more complex packages offer more diverse editing flexibility and more professional results, such as Adobe Photoshop, or Corel Paint Shop Pro. Most software packages offer inline help features and tutorials to guide you through these techniques and more.
Common edits to photos include the elimination of red-eye, which many software packages can do with a simple click of a button, and the removal of an unwanted item from a scene, like a stray swimmer or unwanted car on the road – this is called cloning, where the software samples one section of the image to replace the other. By using parts of the original image, the colouring and texture are the same, so results are good enough to fool almost anybody. Another common touchup is to adjust the amount of light that was available when the photo was originally taken – literally, changing how bright some colours are in relation to others, and how bright the image looks overall. For example, this can make a dark photo look brighter, or a dull photo more vivid.
post-processing
Common edits to photos include the elimination of red-eye, which many software packages can do with a simple click of a button, and the removal of an unwanted item from a scene, like a stray swimmer or unwanted car on the road – this is called cloning, where the software samples one section of the image to replace the other. By using parts of the original image, the colouring and texture are the same, so results are good enough to fool almost anybody. Another common touchup is to adjust the amount of light that was available when the photo was originally taken – literally, changing how bright some colours are in relation to others, and how bright the image looks overall. For example, this can make a dark photo look brighter, or a dull photo more vivid.
adjusting the horizon
Another simple correction that can be made is to rotate the photo so that the horizon or objects captured appear straight. This is often more than simply rotating the image 90 degrees one way or the other, from portrait to landscape, but instead leveling the photo so that it looks straight. Because of the perspective of the photo, it may not be possible to make everything level at once, so you should use the horizon as your ruler, or take a dominant object in the scene, like a person or building, and use that as a guide.
cropping
Cropping can be another powerful editing tool, especially with newer cameras that have greater resolution (giving you a larger source image to work from). Cropping trims off unwanted parts of the photo leaving you with the parts you want to keep. This can have a significant effect on the photo, since you can change the balance, composition and drama of a photo, for example, in a photo where a subject was centered, you can crop off more on one side to align objects with the rule of thirds, or remove portions of the background, like a building, tree or stray person. You can also crop a photo to change it from landscape to portrait, leading to a more interesting picture than the one you originally took.

Thursday, July 10, 2008
What can I do with my cell phone photos?
So you're out in the park with the little one, and out of nowhere he takes his first steps! Ten years ago you would have to just relay the story to friends and family. Now you can whip out your camera phone and take a quick snap to preserve the moment! But now what?
SHARE
Now you can easily share your cell phone photos online, using PhotoWorld.com online service. Simply email your photo from your phone to your online account and instantly share your memorable moments with family and friends. For more info Click Here.
 PRINT
PRINT
To give you an idea of the discrepancies between the download speed and the upload speed take a look at these broadband Internet connection speeds.
TIPS
Although most camera phones take average quality photos, there are a few things you can do to improve camera phone photos.
1. Make sure there is plenty of light, if not use the low light or night setting if you have one.
2. Be steady! Set the phone down if you need to, this will increase sharpness.
3. Use the highest quality settings on your cell phone. Most phones have multiple quality settings so be sure to check what yours is set to.
4. Get close to your subject. Most phones don't have a zoom, so the closer you are, the sharper the image.
5. Edit and enchance. Have fun with your photos from your cell phone. Use PhotoWorld.com online site or your favorite photo editing tool to enhance photos or turn them into cards, collages, etc.
SHARE
Now you can easily share your cell phone photos online, using PhotoWorld.com online service. Simply email your photo from your phone to your online account and instantly share your memorable moments with family and friends. For more info Click Here.
 PRINT
PRINTTo give you an idea of the discrepancies between the download speed and the upload speed take a look at these broadband Internet connection speeds.
TIPS
Although most camera phones take average quality photos, there are a few things you can do to improve camera phone photos.
1. Make sure there is plenty of light, if not use the low light or night setting if you have one.
2. Be steady! Set the phone down if you need to, this will increase sharpness.
3. Use the highest quality settings on your cell phone. Most phones have multiple quality settings so be sure to check what yours is set to.
4. Get close to your subject. Most phones don't have a zoom, so the closer you are, the sharper the image.
5. Edit and enchance. Have fun with your photos from your cell phone. Use PhotoWorld.com online site or your favorite photo editing tool to enhance photos or turn them into cards, collages, etc.
Monday, July 7, 2008
Composition: How to Frame a Photo
Greetings fellow photographers! In this installment we are going to examine photo composition and provide a few tips and tricks for framing your summer vacation photos. Summer may be winding down, but many people use the late summer season as a chance to leave their daily lives behind and explore some of the many wonders our world has to offer. Whether it’s a family road trip or a solo backpacking adventure, the summer vacation has become a longstanding American tradition. There is no better way to document your trip than by taking pictures. Here are a few ideas to keep in mind when shooting your vacation masterpieces:
Let your camera focus, then adjust your framing. Many people are not aware that they can lock in their auto focus before they actually take the photograph. Most cameras will automatically focus on the center spot in a photo, but the center may not necessarily be the most interesting area. Next time you shoot a photo, center in on your subject, push the button only halfway down, and hold it there. This will lock in the focus. Then, recompose your photo; move the subject left, right, up, or down, and take the shot. For scenic photos, lock in your focus with the horizon line centered, then shift it down to show more sky, or up to show more foreground. The same concept applies when photographing people; an off-center person or group is more interesting than a completely centered subject. As we all know, a centered human being is not all it’s cracked up to be!
Give your subject some space! We’ve all heard horror stories of people accidentally losing their digital photos. Imagine this: you book the family on a whale watching excursion, and after several cloudy hours, the sun breaks through and creates a perfect rainbow. You place your family in the foreground, and at that moment, a humpback whale surfaces in the background. You snap the photo, no one blinks, and you have a perfect shot of your family on the ocean with a humpback whale and a rainbow in the background. A few days later, you pull out your camera to show Uncle Joe the incredible shot you took, and you accidentally press Erase All, deleting your perfect whale shot, along with all the other photos from the trip. Now, you may be thinking, “That won’t happen to me.” Famous last words! Why take the risk?
Use natural framing to your advantage. Take a moment to examine any elements you can use to create a natural frame. For example, a low-hanging branch can help frame a scenic shot, a weathered door can add spice to a portrait, and a patch of grass surrounded by a field of wildflowers can help isolate your subject. Natural frames are everywhere – see what you can find!
Draw attention to your subject using linear objects. Our eyes naturally follow lines in a photo. For instance, a child leaning up against a fence post can make for a beautifully subtle photograph. By including some of the fence line in the foreground, you set up a natural arrow straight toward the child. A long stretch of railroad tracks can be the perfect pointer to a majestic mountain range. Examine your surroundings and see if you can use any linear objects in this way.
Look at the big picture. Before you shoot a photo, take a look at the entire area through the viewfinder. Sometimes in the excitement of capturing a fantastic photo, we forget to look at everything happening in the background. A bright red stop sign can ruin a beautiful portrait of Grandma by taking the attention away from her. You may see something that was not obvious before, and you’ll want to make adjustments. Take a knee, move around, or change angles. Did you mean to include all that dead space above your subject? If not, zoom in tighter and reshoot the photo. Or, perhaps you were already zoomed in too tight; zoom out and reshoot to include the vast surroundings and make a statement about how small we really are in nature’s grand scheme.
The basic lesson here is to be aware of your surroundings when framing your photos. Summer vacation shots often find their way to your desk at work or hung in the family room at home. Impress people with your composition skills. Play around with these ideas a bit and see what works for you. After a little bit of practice you’ll find it will start to come naturally. Remember that a great photograph captures not only the subject, but the way the subject interacts with the setting. Well, that does it for now. Next time we’ll wrap up our Summer Series by talking about back to school photos that even the kids will enjoy! See you then!
Tuesday, July 1, 2008
Online Photo Editors
Fauxto - image editing application which allows you to free-transform beautiful, anti-aliased text within a layer, and then apply a multi-colored radial gradient with a variable focal point in another. You’ll be quite surprised with what you can do within Fauxto.
SnipShot is a browser based image editor. It enables to save pictures as GIF, JPG, PDF, PNG or TIF. It has basic editing tools like crop, rotate, resize, and basic image adjustments like contrast, brightness, saturation, sharpness and hue. There is unlimited undo and redo.
MyImager - is free online image editor. Upload or call images from anywhere on the web and edit them freely with the the dozens of tools and filters that myImager.com offers.
Phixr allows you to edit your pictures and directly upload them to Flickr, Fotopic, Livejournal, Photobucket, Fotolog.com, and others.With
Pixer.us you can edit your photos online using only your browser. You can apply functions like saturation, colorfx, blur and sharpen, brightness and contrast.
Pixenate is online photo editing software that you can use stand-alone or integrate into an existing photo-sharing or photo-printing website. If you provide a photo-based web service, Pixenate can significantly enhance the ’stickiness’ of your website by offering an easy-to-use integrated photo editor that doesn’t require your users to download and install additional software.
OnlinePhotoTool allows you to edit and save your images, screenshots and photos online. The following functions are possible: resize, crop, add text, sharpen, rotate, flip, colour balance, saturation, levels, paint, add icons, sepia, black and white.
With XMG Image you can host, edit, organize, and share your images with ease. XMG Image gives you the ability to manipulate your images in any way possible. Do simple functions like, crop, rotate, resize, and constrain images with 1-click. More advanced features include, advanced effects, image enhancing and more.
Thursday, June 19, 2008
11 Tips for Better Candid Photography
Candid styles of photography are increasingly becoming popular both in general day to day photography but also in formal photographic situations. Last time I was asked to photograph a wedding the couple actually hired me purely to take paparazzi style shows of them and their guests throughout the day. They had another photographer for the formal shots and gave me the brief of getting a behind the scenes look of the day.
 Probably the best way to take spontaneous photographs is to always be ready to do so. I have a DSLR which I take out when I’m on a shoot but between shoots like to cary with a quality point and shoot camera that I can whip out at a moments notice to capture the many opportunities for a good photo that life presents us with. Taking your camera with you everywhere also helps people to be more at ease with you taking their photo. I find that my friends and family just expect me to have my camera out so when I do fire it up it’s not a signal to them to pose but it’s a normal part of our interaction - this means that they are relaxed and the photos are natural.
2. Use a Long Zoom
Obviously the further you are away from your subject the less likely they will be to know that you’re photographing them and the more natural and relaxed they’ll act. Using a telephoto lens or long zoom enables you to shoot from outside their personal space but keep the feeling of intimacy in the shot you’re taking.
3. Kill the Flash
Perhaps the most obvious way that you can signal to another person that you’re photographing them is to use a flash. There’s nothing like a blinding flash of light in the eyes to kill a moment. If possible (and it’s not always) attempt to photograph without the flash if you’re aiming for candid shots. When in lower light situations increase your ISO setting, use a faster lens, open up your aperture or if your camera has a ‘natural light mode’ turn it on. Hopefully one or a combination of these approaches will help you blend into the background a little more.
4. Shoot lots
When you shoot multiple images quickly of a person you can sometimes get some surprising and spontaneous shots that you’d have never gotten if you shot just one. Switch your camera to continuous shooting mode and shoot in bursts of images and in doing so you’ll increase your chances of that perfect shot.
5. Position Yourself strategically
 While Candid Photography is about capturing the spontaneity of a moment and getting that perfect shot at the right split second of time I find that if you think ahead and anticipate what is about to unfold in front of you that you can greatly increase the chances of getting some great shots. So at a wedding get to the church early (or even go to the rehearsal) and think about what will happen during the ceremony and where will be best for you to stand to capture each moment. Which way will people be facing? What will they be doing? What will the light be like? Thinking through these issues will save you having to run around repositioning yourself when you should be shooting images - it’ll also mean you take a whole heap less shots of the back of people’s heads!
6. Photograph People Doing things
 Images of people doing things tend to be much more interesting than people sitting passively doing nothing. For one your subject will be focussed upon something which adds energy to a photo (and takes their focus off you) but it also puts them in context and adds an element of story to your image. Timing is everything in Candid shots so wait until they are distracted from you and fully focussed upon what they are doing or who they are with and you’ll inject a feeling into your shots of them being unaware and that the viewer of your image is looking on unseen.
7. Photograph People with People
Something very interesting happens when you photograph more than one person in an image at a time - it introduces relationship into the shot. Even if the two (or more) people are not really interacting in the shot it can add depth and a sense of story into the viewing of the image. Of course ideally in candid shots you’d like some interaction between your subjects as that will add emotion into the shot also as we the viewer observe how the people are acting.
8. Shoot from the Hip
If your subject is aware that you’re there and that you have your camera out they might tense up or act a little unnaturally as they see you raising your camera to the eye. The beauty of digital cameras is that it doesn’t cost you anything to take lots of shots and it can be well worth shooting without raising your camera. To do this most effectively you might want to set your lens to a wider angle setting to make up for any aiming problems you might have.
9. Mix up your Perspective
 The other beauty of shooting from the hip is that it gives you a slightly different perspective to take the shot from (ie shooting from 3 feet height instead of 6). This adds to the candid nature of the shots. In fact sometimes it’s the slightly crooked, slightly out of focus or poorly composed shots taken from this type of angle that ends up looking the best because they come across as quite random. Of course you can add all these new perspectives to your shots without shooting from the hip. Crouch down, get up high, frame your shots on an angle, zoom in close and then quickly zoom out to a wide angle, break the rules of composition etc and you will add a new perspective to your shots that can mean they look fresh and surprising.
10. Frame Images with Foreground Elements
A trick that I often use in candid shots is to purposely include something in the foreground of the shot to make it look as though I’m hiding behind it. You might do this with by shooting over someone’s shoulder, by including a little of a tree branch or the frame of a doorway.
11. Take Posed Shots into Candid Territory
 One of my favorite times to shoot candid shots is when other people are taking formal ones. This is because everyone in the shot is focused on the one element (the other photographer) - but it’s not you. If the main photographer has posed the happy couple of the day or their bridal partly look for a different angle to them to take a shot of the same subject. Often if you take a few steps to the side and shoot from almost a profile position you can get great shots. Also zooming in to take shots of just one or two of the people in a larger group at these times can work well. Also try zooming right out to take a shot of the photographer and their subject all in one. If you’re the only photographer and you’re taking formal shots a great technique is to take your posed shot and then continue to shoot after everyone thinks you’ve finished. It’s often the shots just after the posed one that are the best as people relax and look at each other.
The results, when they put together my shots with the formal ones were a wonderful blend of photos that told a fuller story than if they’d gone for one or the other.
Below are a number of tips to help photographers improve their ‘candid’ photography. Please note that these tips are not about taking sneaky, voyeuristic or true paparazzi shots (ie photographing people without their permission) but rather about how to add a more candid feel to the shots you take of people that you know.
1. Take your Camera Everywhere.
 Probably the best way to take spontaneous photographs is to always be ready to do so. I have a DSLR which I take out when I’m on a shoot but between shoots like to cary with a quality point and shoot camera that I can whip out at a moments notice to capture the many opportunities for a good photo that life presents us with. Taking your camera with you everywhere also helps people to be more at ease with you taking their photo. I find that my friends and family just expect me to have my camera out so when I do fire it up it’s not a signal to them to pose but it’s a normal part of our interaction - this means that they are relaxed and the photos are natural.
2. Use a Long Zoom
Obviously the further you are away from your subject the less likely they will be to know that you’re photographing them and the more natural and relaxed they’ll act. Using a telephoto lens or long zoom enables you to shoot from outside their personal space but keep the feeling of intimacy in the shot you’re taking.
3. Kill the Flash
Perhaps the most obvious way that you can signal to another person that you’re photographing them is to use a flash. There’s nothing like a blinding flash of light in the eyes to kill a moment. If possible (and it’s not always) attempt to photograph without the flash if you’re aiming for candid shots. When in lower light situations increase your ISO setting, use a faster lens, open up your aperture or if your camera has a ‘natural light mode’ turn it on. Hopefully one or a combination of these approaches will help you blend into the background a little more.
4. Shoot lots
When you shoot multiple images quickly of a person you can sometimes get some surprising and spontaneous shots that you’d have never gotten if you shot just one. Switch your camera to continuous shooting mode and shoot in bursts of images and in doing so you’ll increase your chances of that perfect shot.
5. Position Yourself strategically
 While Candid Photography is about capturing the spontaneity of a moment and getting that perfect shot at the right split second of time I find that if you think ahead and anticipate what is about to unfold in front of you that you can greatly increase the chances of getting some great shots. So at a wedding get to the church early (or even go to the rehearsal) and think about what will happen during the ceremony and where will be best for you to stand to capture each moment. Which way will people be facing? What will they be doing? What will the light be like? Thinking through these issues will save you having to run around repositioning yourself when you should be shooting images - it’ll also mean you take a whole heap less shots of the back of people’s heads!
6. Photograph People Doing things
 Images of people doing things tend to be much more interesting than people sitting passively doing nothing. For one your subject will be focussed upon something which adds energy to a photo (and takes their focus off you) but it also puts them in context and adds an element of story to your image. Timing is everything in Candid shots so wait until they are distracted from you and fully focussed upon what they are doing or who they are with and you’ll inject a feeling into your shots of them being unaware and that the viewer of your image is looking on unseen.
7. Photograph People with People
Something very interesting happens when you photograph more than one person in an image at a time - it introduces relationship into the shot. Even if the two (or more) people are not really interacting in the shot it can add depth and a sense of story into the viewing of the image. Of course ideally in candid shots you’d like some interaction between your subjects as that will add emotion into the shot also as we the viewer observe how the people are acting.
8. Shoot from the Hip
If your subject is aware that you’re there and that you have your camera out they might tense up or act a little unnaturally as they see you raising your camera to the eye. The beauty of digital cameras is that it doesn’t cost you anything to take lots of shots and it can be well worth shooting without raising your camera. To do this most effectively you might want to set your lens to a wider angle setting to make up for any aiming problems you might have.
9. Mix up your Perspective
 The other beauty of shooting from the hip is that it gives you a slightly different perspective to take the shot from (ie shooting from 3 feet height instead of 6). This adds to the candid nature of the shots. In fact sometimes it’s the slightly crooked, slightly out of focus or poorly composed shots taken from this type of angle that ends up looking the best because they come across as quite random. Of course you can add all these new perspectives to your shots without shooting from the hip. Crouch down, get up high, frame your shots on an angle, zoom in close and then quickly zoom out to a wide angle, break the rules of composition etc and you will add a new perspective to your shots that can mean they look fresh and surprising.
10. Frame Images with Foreground Elements
A trick that I often use in candid shots is to purposely include something in the foreground of the shot to make it look as though I’m hiding behind it. You might do this with by shooting over someone’s shoulder, by including a little of a tree branch or the frame of a doorway.
11. Take Posed Shots into Candid Territory
 One of my favorite times to shoot candid shots is when other people are taking formal ones. This is because everyone in the shot is focused on the one element (the other photographer) - but it’s not you. If the main photographer has posed the happy couple of the day or their bridal partly look for a different angle to them to take a shot of the same subject. Often if you take a few steps to the side and shoot from almost a profile position you can get great shots. Also zooming in to take shots of just one or two of the people in a larger group at these times can work well. Also try zooming right out to take a shot of the photographer and their subject all in one. If you’re the only photographer and you’re taking formal shots a great technique is to take your posed shot and then continue to shoot after everyone thinks you’ve finished. It’s often the shots just after the posed one that are the best as people relax and look at each other.
Sunday, June 15, 2008
Top Ten Digital Photography Tips
You've heard this before: Digital cameras do all the work. You just push the button and great pictures magically appear. The better the camera, the better the photos. Isn't that right? Heck no!
The truth is that you can make great photos with a simple consumer point-and-shoot camera, or take lousy shots with the most expensive Nikon. It's not the camera that makes beautiful images; it's the photographer. With a little knowledge and a willingness to make an adjustment here and there, you can squeeze big time photos out of the smallest digicam.
To help you down the road to great image making, here are ten tips that will enable you shoot like a pro (without maxing out your credit card on all that expensive equipment).
1. Warm Up Those Tones
Have you ever noticed that your shots sometimes have a cool, clammy feel to them? If so, you're not alone. The default white balance setting for digital cameras is auto, which is fine for most snapshots, but tends to be a bit on the "cool" side.
When shooting outdoor portraits and sunny landscapes, try changing your white balance setting from auto to cloudy. That's right, cloudy. Why? This adjustment is like putting a mild warming filter on your camera. It increases the reds and yellows resulting in richer, warmer pictures.
If you don't believe me, then do a test. Take a few outdoor shots with the white balance on auto, then take the same picture again with the setting on cloudy. Upload the images to your computer and look at them side by side. My guess is that you'll like the warmer image better.
2: Sunglasses Polarizer
If you really want to add some punch to your images, then get your hands on a polarizing filter. A polarizer is the one filter every photographer should have handy for landscapes and general outdoor shooting. By reducing glare and unwanted reflections, polarized shots have richer, more saturated colors, especially in the sky.
What's that you say? Your digital camera can't accommodate filters. Don't despair. I've been using this trick for years with my point-and-shoot cameras. If you have a pair of quality sunglasses, then simply take them off and use them as your polarizing filter. Place the glasses as close to the camera lens as possible, then check their position in the LCD viewfinder to make sure you don't have the rims in the shot.
For the best effect, position yourself so the sun is over either your right or left shoulder. The polarizing effect is strongest when the light source is at a 90-degree angle from the subject.
3. Outdoor Portraits That Shine
 One of the great hidden features on digital cameras is the fill flash or flash on mode. By taking control of the flash so it goes on when you want it to, not when the camera deems it appropriate, you've just taken an important step toward capturing great outdoor portraits.
In flash on mode, the camera exposes for the background first, then adds just enough flash to illuminate your portrait subject. The result is a professional looking picture where everything in the composition looks good. Wedding photographers have been using this technique for years.
 After you get the hang of using the flash outdoors, try a couple variations on this theme by positioning the subject so the sun illuminates the hair from the side or the back, often referred to as rim lighting. Another good technique is to put the model in the shade under a tree, then use the flash to illuminate the subject. This keeps the model comfortable and cool with no squinty eyes from the harsh sun, and this often results in a more relaxed looking portrait.
Remember, though, that most built-in camera flashes only have a range of 10 feet (or even less!), so make sure you don't stand too far away when using fill flash outdoors.
4. Macro Mode Madness
Remember as a kid discovering the whole new world beneath your feet while playing on the grass? When you got very close to the ground, you could see an entire community of creatures that you never knew existed.
These days, you might not want to lie on your belly in the backyard, but if you activate the close up mode on your digital camera and begin to explore your world in finer detail, you'll be rewarded with fresh new images unlike anything you've ever shot before.
Even the simplest object takes on new fascination in macro mode. And the best part is that it's so easy to do with digital cameras.
Just look for the close up or macro mode icon, which is usually a flower symbol, turn it on, and get as close to an object as your camera will allow. Once you've found something to your liking, hold the shutter button down halfway to allow the camera to focus. When the confirmation light gives you the go ahead, press the shutter down the rest of the way to record the image.
Keep in mind that you have very shallow depth of field when using the close up mode, so focus on the part of the subject that's most important to you, and let the rest of the image go soft.
5. Horizon Line Mayhem
For some mysterious reason, most human beings have a hard time holding the camera level when using the LCD monitors on their digicams. The result can be cockeyed sunsets, lopsided landscapes, and tilted towers.
Part of the problem is that your camera's optics introduce distortion when rendering broad panoramas on tiny, two-inch screens. Those trees may be standing straight when you look at them with the naked eye, but they seem to be bowing inward on your camera's monitor. No wonder photographers become disoriented when lining up their shots.
What can you do? Well, there's no silver bullet to solve all of your horizon line problems, but you can make improvements by keeping a few things in mind.
First of all, be aware that it's important to capture your images as level as possible. If you're having difficulty framing the scene to your liking, then take your best shot at a straight picture, reposition the camera slightly, take another picture, and then maybe one more with another adjustment. Chances are very good that one of the images will "feel right" when you review them on the computer. Simply discard the others once you find the perfectly aligned image.
If you practice level framing of your shots, over time the process will become more natural, and your percentage of level horizon lines will increase dramatically.
6: Massive Media Card
When you're figuring out the budget for your next digital camera, make sure you factor in the purchase of an additional memory card. Why? Because the cards included with your new high-tech wonder toy are about as satisfying as an airline bag of peanuts when you're dying of hunger.
If you have a 3 megapixel camera, get at least a 256MB card, 512MBs for 4 megapixel models, and 1GB for for 6 megapixels and up.
That way you'll never miss another shot because your memory card is full.
7: High Rez All the Way
One of the most important reasons for packing a massive memory card is to enable you to shoot at your camera's highest resolution. If you paid a premium price for a 6 megapixel digicam, then get your money's worth and shoot at 6 megapixels. And while you're at it, shoot at your camera's highest quality compression setting too.
Why not squeeze more images on your memory card by shooting a lower resolution and low quality compression settings? Because you never know when you're going to capture the next great image of the 21st century. And if you take a beautiful picture at the low 640 x 480 resolution, that means you can only make a print about the size of a credit card, not exactly the right dimensions for hanging in the museum.
On the other hand, if you recorded the image at 2272 x 1704 (4 megapixels) or larger, then you can make a lovely 8- x 10-inch photo-quality print suitable for framing or even for gracing the cover of Time magazine. And just in case you were able to get as close to the action as you had liked, having those extra pixels enables you to crop your image and still have enough resolution to make a decent sized print.
The point is, if you have enough memory (and you know you should), then there's no reason to shoot at lower resolution and risk missing the opportunity to show off your work in a big way.
8: Tolerable Tripod
I once overheard someone say, "He must be a real photographer because he's using a tripod." Well, whether or not you use a tripod has nothing to do with you being a true photographer. For certain types of shots though, these three-legged supports can be very useful.
The problem is tripods are a pain in the butt to carry around. They are bulky, unwieldily, and sometimes downright frustrating. Does the phrase "necessary evil" come to mind?
For digital shooters there's good news: the UltraPod II by Pedco. This compact, versatile, ingenious device fits in your back pocket and enables you to steady your camera in a variety of situations. You can open the legs and set it on any reasonable flat surface such as a tabletop or a boulder in the middle of nowhere. But you can also employ its Velcro strap and attach your camera to an available pole or tree limb.
You might not need a tripod that often, but when you do, nothing else will work. Save yourself the pain and money of a big heavy lug of a pod, and check out the svelte UltraPod. Yes, then you too can be a real photographer.
9: Self Timer Fun
Now that you have your UltraPod in hand, you can explore another under-used feature found on almost every digital camera: the self timer. This function delays the firing of the shutter (after the button has been pushed) for up to 10 seconds, fixing one of the age old problems in photography: the missing photographer.
Hey, just because you've been donned as the creative historian in your clan, that doesn't mean that your shining face should be absent from every frame of the family's pictorial accounting. You could hand your trusty digicam over to strangers while you jump in the shot, but then you take the chance of them dropping, or even worse, running off with your camera.
Instead, attach your UltraPod, line up the shot, activate the self timer, and get in the picture.
This is usually a good time to turn on the flash to ensure even exposure of everyone in the composition (but remember that 10 foot flash range limit!). Also, make sure the focusing sensor is aimed at a person in the group and not the distant background, or you'll get very sharp trees and fuzzy family members.
Self timers are good for other situations, too. Are you interested in making long exposures of cars driving over the Golden Gate Bridge at dusk? Once again, secure your camera on a tripod, then trip the shutter using the self timer. By doing so, you prevent accidental jarring of the camera as you initiate the exposure.
10. Slow Motion Water
Water shots that look like paintings. These images are created by finding a nice composition with running water, then forcing the camera's shutter to stay open for a second or two, creating a soft, flowing effect of the water while all the other elements in the scene stay nice and sharp.
You'll need a tripod to steady the camera during the long exposure, and you probably should use the self timer to trip the shutter. If you camera has an aperture priority setting, use it and set the aperture to f-8, f-11, or f-16 if possible. This will give you greater depth of field and cause the shutter to slow down.
Ideally, you'll want an exposure of one second or longer to create the flowing effect of the water. That means you probably will want to look for streams and waterfalls that are in the shade instead of the bright sunlight.
Another trick is to use your sunglasses over the lens to darken the scene and create even a longer exposure. Plus you get the added bonus of eliminating distracting reflections from your composition.
Final Thoughts
Most digital cameras, even the consumer point-and-shoot models, have a tremendous amount of functionality built into them. By applying a little ingenuity and creativity, you can take shots that will make viewers ask, "So what kind of camera do you have?"
You can tell them the answer, but inside, you'll know it's not the camera responsible for those great pictures. It's the photographer.
How many pixels do I need?
Here are some guidelines to optimize your prints:
4x6 - 800 x 1200 (200 dots per inch)
5x7 - 1000 x 1400 (200 dpi)
8x10 - 1600 x 2000 (200 dpi)
8x12 - 1600 x 2400 (200 dpi)
9x12 and up 2000 x 3000 from a 6 megapixel digital camera (200 dpi).
While we recommend 300 dpi for optimal clarity, 200 dpi will yield excellent results. The difference in print quality isn't noticeable to the naked eye. The difference is that a 200dpi file is 1/2 the file size, taking half the time to send to digidreamgrafix@gmail.com
Thursday, June 5, 2008
Subscribe to:
Posts (Atom)